January 20, 2016

Quilt 52: Sawtooth Star Poppies - matching up a 1-way print for the backing

It's come along beautifully! Here's the original design (from the quilt design software): 
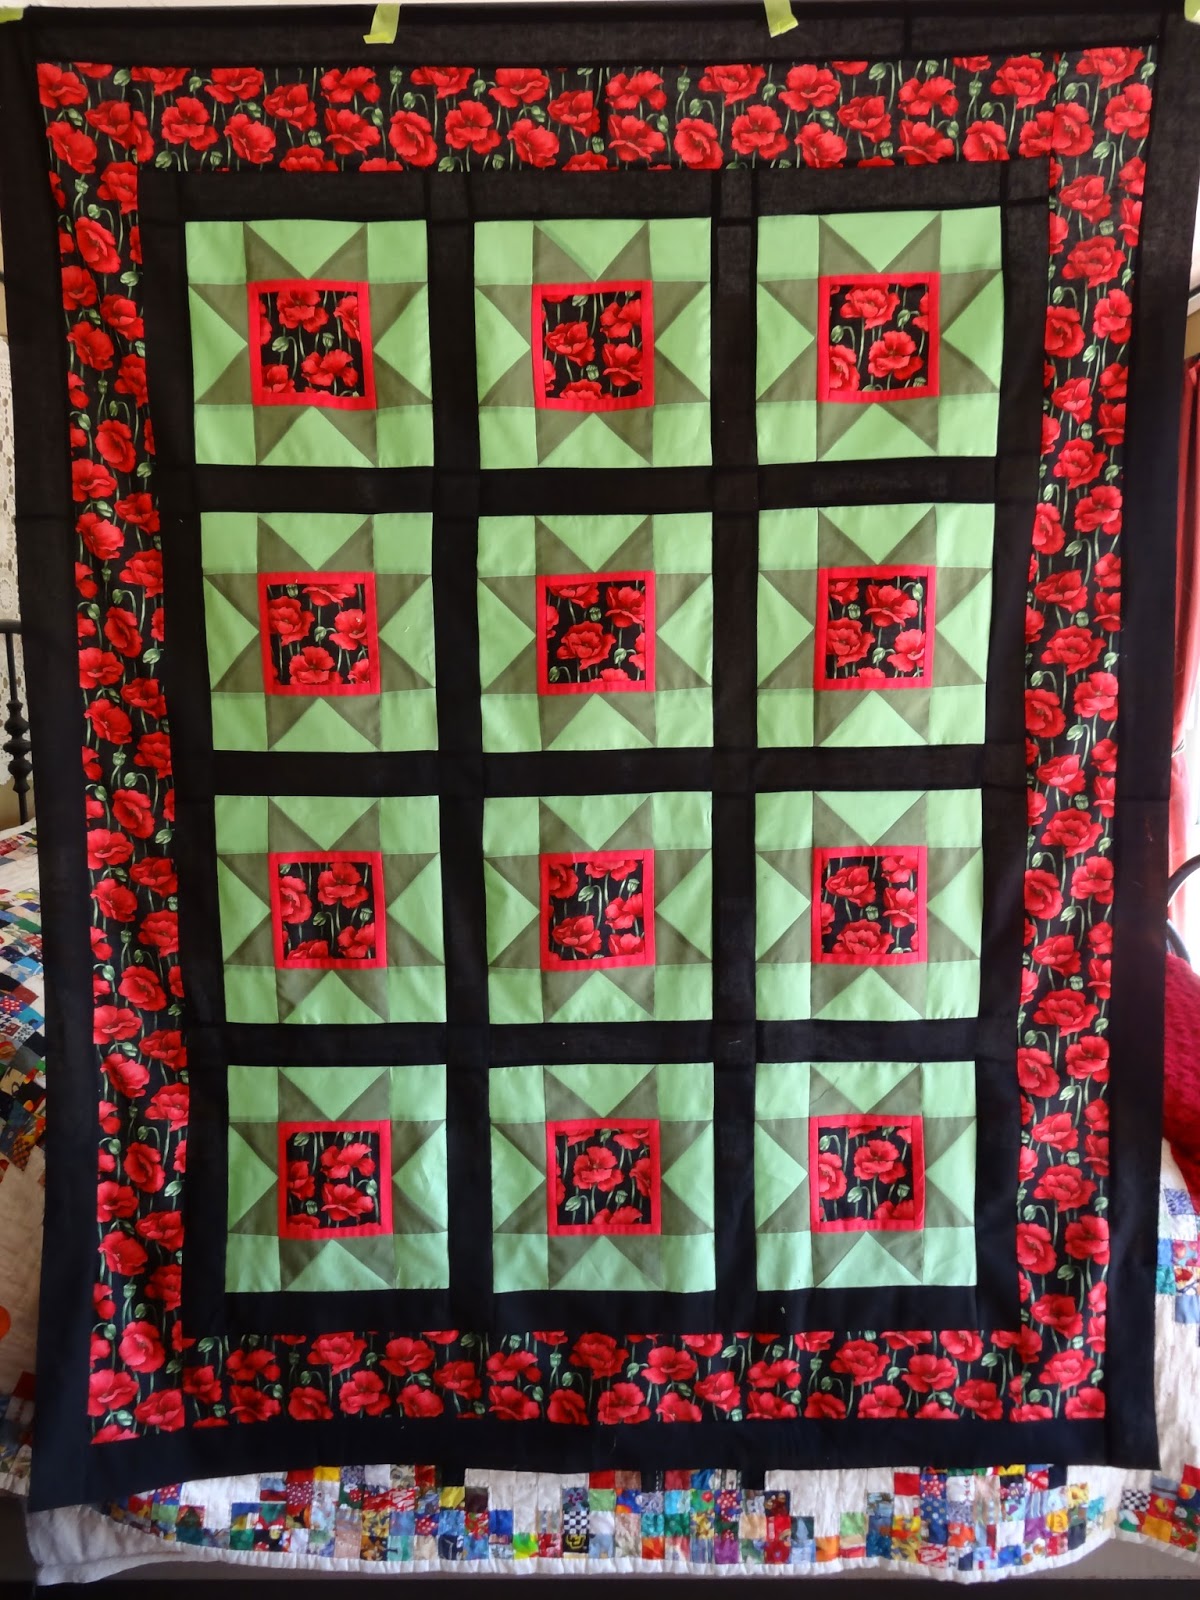
 And here's the assembled quilt top:
 
I'm going to quilt it using the "simply stippling" groovy board (below).
Of the options I have at the moment, I think this stitch design is the best choice - but what colour thread to use?  I've got red, soft green, and black.  I sent the photo below to Anna (who the quilt belongs to) and we discussed it.

We agreed to use the green.  That one will have the least "distraction factor" on the star points, and should fade in fairly well on the poppy print.  Of course it will be very obvious in the black strips, but that's OK.  

Now to put together the backing.  Anna selected a gloriously bold print with massive poppies. Like the poppies on the top, the backing is a one-way design. When I made her granddaughter's quilt a few months ago, I was unhappy with the backing because I didn't notice the 1-way print, and so didn't take the time to align it.  I didn't want to repeat that mistake on this quilt.  Fortunately, we got enough of it to allow me to match up the pattern, and here's how I did it:

First, I folded along the edge of one of the 2 panels I'm joining for the backing, ironing a very sharp crease int the fabric.  Then (as you see below), I matched up the prints and pinned on the right side to keep the alignment in place.

Then I folded over and pinned the right sides together, staying close to the line of pins on the ohter side.
Then I removed the first row of pins - which now (on the back side of the fabric) reveals that sharp crease I ironed into the fabric.  All I had to do then was stitch along that crease (actually, I basted first as I was a bit worried it wouldn't line up right and I might have to unpick it).
And... VOILA!  Below you can see the center of the backing panel - and how well the stitching line has aligned the poppies. 
It wasn't terribly difficult to do this, and it makes a much more uniform backing.  I did get lucky in that the pattern in this print is repeated fairly regularly, and I didn't need to get extra fabric to accomplish lining up the poppies.  The next time I buy backing fabric, though, I'm going to make sure I buy enough to cover aligning the repeating prints (so if the pattern repeats every 30 cm or so, I'll buy 30cm extra to be sure I can match up the pattern).

Now to mount the quilt on the longarm and get this project finished!

January 13, 2016

Quilt 52: Sawtooth Star Poppies - and a lesson I may have finally learned...

I'm well along the way with the "Sawtooth Star" quilt I mentioned last week.  Yeah, it's looking pretty good.
Now, there's one problem with this design.  The two green fabrics, when directly up against the poppy print, tend to dampen down the brightness of the poppies.  You wouldn't think that would happen, but there you are. So I opted to insert a half-inch frame around the poppies to separate them from the green:
So all is good. Or is it?!?!  NO!  Have a look at the picture below.

How this happened, I just don't know, but it's happened to me before.  In the photo above you can see that the green triangles segment is just about 1/4" too short!  I promise you that I cut the patches out VERY carefully, and did follow the cutting instructions from the design software.  But... for some reason... a sometimes it's ended up just a smidge too narrow.

I'm not sure what I'm doing wrong.  Maybe I was pulling slightly as the on-the-bias edges went together.  At first I thought I might have pulled the pink edging on the center block, but no... it's exactly 5 1/2", just as it should be.  I just don't know.  But this has happened on quilts where I wasn't sewing on-the-bias edges.

Well - here's the lesson for me.  Calico does tend to have a little "stretch" going one way.  Along the selvage (woven edge), there's no "give" at all.  But pull the fabric at a right angle to the selvage, and yes... there's a little stretch there.  Not much, mind you, but a little.

So, what I'm finding is that it pays to be mindful of that stretch (hm... is there a name for it?) when cutting out, and line it up so that the stretch runs along the edge you think might be the most vulnerable to being "off base".  In the case of this Sawtooth Star, that would be the edge running along the center block.

So, I've put the stretch as you see it below (I added the yellow arrows to show where the stretchy edge is):
Now, when I join the edge to the center block, I've got a little bit of "play" if I need it.

There's definitely a "happy ending" here, because doing this definitely worked.  Here's the proof:

The first block came together nicely - so did the 11 others.

January 8, 2016

"So God Made A Quilter"

I was out "Google hunting" for information today, and stumbled across a lovely video on the website of company AccuQuilt:


(click the link above and ENJOY!)

January 6, 2016

Quilt 52: Sawtooth Star Poppies - Quilt Design Wizard software's cutting instructions

Way back in September, my friend and neighbor Anna asked me to make 3 more quilts for her: one for her granddaughter, one for her grandson, and one for herself.  The grandkids visited here in October, so I got those 2 done lickety-split.

(Here's my post about the granddaughter's quilt and here's one one about the grandson's.)

For the grandkids' quilts, we went into the fabric store with designs and yardage notes in-hand. For her quilt, however, well, that's a different story.  Anna wasn't sure she wanted another quilt until after she saw the poppy prints (below).  She was especially wild about the one on the right. 

(click the picture above to see a larger image)

So she bought some of that poppy print we picked up the coordinating solids for the top.  The poppy print in the upper left is for the backing.  I had a design idea at the time - but, well, every time I got the fabric out and started thinking about doing it, I just lost my enthusiasm for that design and my confidence that the quilt would turn out well.
EEK!  I was INTIMIDATED!

But last week I pulled the fabric out once again, and sat down with my quilting software to come up with a design that I thought would do justice to the fabric.  And YAY!  I found a block design that will work beautifully:  "Sawtooth Star".


Do you love it?!?!  Me, TOO!

I've often mentioned Quilt Design Wizard - the software I use to design most of my quilts.  I love this tool - it's not perfect (watch out for the yardage calculator if you are doing on-point designs), but oh, it's so much fun to work with, does a decent job of calculating the required yardage, and gives great rotary cutting instructions.  As a matter of fact - I thought you might like to see what the rotary cutting instructions look like - so here you go:

This is the summary page, showing each of the 3 fabrics, and the different patches that need to be cut out:

(as always, click the images to see larger versions)

I'm aiming for the finished blocks to be 10" square (which means 10.5" square to allow for a 1/4" seam allowance).  The overall pattern (upper left of the above photo) labels each of the different patches according to their dimensions:

The "A" patches (on the corners) are just 3" squares, and you have to cut 4 of them.
"B" patches (triangles on the sides) now - started with cutting a 6/14 square and then slicing diagonally, which will give you 4 patches:
 And "C" - the center square, which is just a 5 1/2" patch:
 And then the "D" patches, made from squares cut at 3 3/8" and then diagonally sliced.

Pretty cool, eh?  I love how each of the detailed cutting guidelines are accompanied by a little sample of the fabric/colour from the quilt design.  And you can see from the diagram exactly how the block is put together with the various patches.  It makes it pretty easy, really.

The software vendor ("The Electric Quilt Company") offers 2 versions of their product:
The "...Wizard" version is the one I've been using.  It's a "reduced version" of Electric Quilt (has fewer features) and costs significantly less.  GREAT value for the money, and a good place to start if you aren't familiar with tools like this.  It's got a fairly easy-to-understand user interface, and comes with short tutorial videos which give you a great start learning the different features. I've had my copy for several years now and have loved it.

 These days I've been toying with getting the more expensive but fancier Electric Quilt. The main reason for this is that it comes with 5,000 fabric prints embedded (Wizard has 3,000) AND it allows you to scan and add your own prints to the digital library.  The scan/add feature would have come in really handy for several of the projects I did last year.  So maybe... maybe.. in 2016?