For this quilt, I decided to be really brave and experiment quite a bit. So with this project I tried 4 new things:
- cheap thread for the top thread (instead of the "good stuff")
- different threat colours for the bottom and top threads
- a new free motion quilt pattern
- RULERS!
 |
| 48" x 59" - quilted on the longarm - 100% cotton batting |
With such wildly contrasting colours on the top (and the navy backing), it took me a while to decide how to quilt this one. I didn't want the quilting to overpower or obscure the print and block patterns, so I opted to use two different colours of thread for the quilting: orange (over the orange borders) and navy (in over the planet print). With the backing done in solid navy, I decided to experiment with orange thread on top and navy in the bobbin.
But what should I quilt first? The border or the blocks?
I decided to do the border first - and used a free-motion pattern from Angela Walters' free motion book "Shape by Shape". The pattern I chose is her "Back-and-Forth Lines", which I hoped would look like "space waves".
 |
| "Back-and-Forth Lines" on the top border |
I was using a cheap thread (another experiment), and had to use a large needle (size 18) to keep the thread from shredding. Because of the large needle, the bottom thread is coming through on the top - little navy dots along the orange line. For this quilt it doesn't matter; it actually adds to the "outer space" theme (Morse Code?).
I managed to get the orange area quilted, but did have to restart the thread several times due to breakage. My conclusion is that cheap thread is more trouble than it's worth on the longarm. I won't do that again.
 |
| The same pattern on the side border |
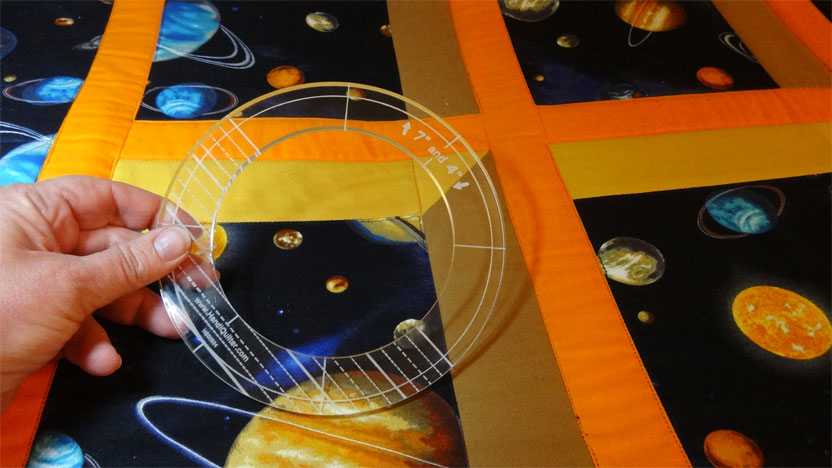
For the internal blocks, I decided to use my new rulers. I'd played on scrap fabric first, of course, and watched several videos on YouTube about how to work with rulers. Those videos and the practice runs turned out to be really valuable.
Here's the lucite ruler base needed for this kind of work. It pretty much just snaps over the machine base.


I have to admit I found it almost impossible to stay perfectly in the ditch. And I was using orange thread at this stage. The slightest slip to the right (into the blue print, especially) shows up like a scream. I found it better to switch to navy thread and quilt on the blue print just to the side of the seam. That was a lot easier to do and the few places where my line wasn't perfectly straight just don't really show up.
 |
| (Click the picture above to see a larger image) |
I decided to use a round ruler and make arcs curving over the planets. Here's the ruler:


No comments:
Post a Comment